 button to create a new display view. Up to four display views can be added per tab.
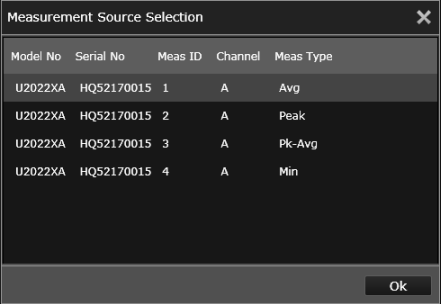
 button (near the top of the Display tab) and select the desired measurement.
  button to create a new display view. Up to four display views can be added per tab. button (near the top of the Display tab) and select the desired measurement.
 On the right side of the current display view, a Tools Palette provides controls for the following display options.

|
Change the title at the top of the current display view. |

|
Reset the displayed Minimum/Maximum measured values. |

|
Switch to the Compact Mode. This view gives a small, simplified view of one measurement at a time and is suitable for viewing on small computer monitors. For more information, see Using Compact Mode Display. |
 button next to the "Measurement" properties drop-down pane. Measurements and operations will be displayed in real time. To stop the measurement acquisition for this view, click the
  button next to the "Measurement" properties drop-down pane.
 button located at the bottom of the Settings tab. Measurements and operations will be displayed in real time. To stop all assigned measurements on all display views simultaneously, click the
  button located at the bottom of the Settings tab.
As shown in the screen capture above, an Information Panel drop-down is provided under the current display view. This panel summarizes important measurement information for the current display view.
For the Digital Meter view, the Information Panel provides a summary of Alert Limit conditions for the current measurement. For more information, see Set Measurement Alert Limits.